The canvas
The frame, compositing, layers, opacity, and visibility.
The canvas is your project’s video output — the surface where every playing clip appears, live while you perform, in the preview output, and in everything you render. This page is about directing it.
The frame
Pick the canvas shape: landscape, portrait, or square. Portrait for the phone-video piece, square for the loop, landscape for everything else. Switching shapes doesn’t scramble your clip placements — arrangements survive reframing.
Every playing clip is on stage
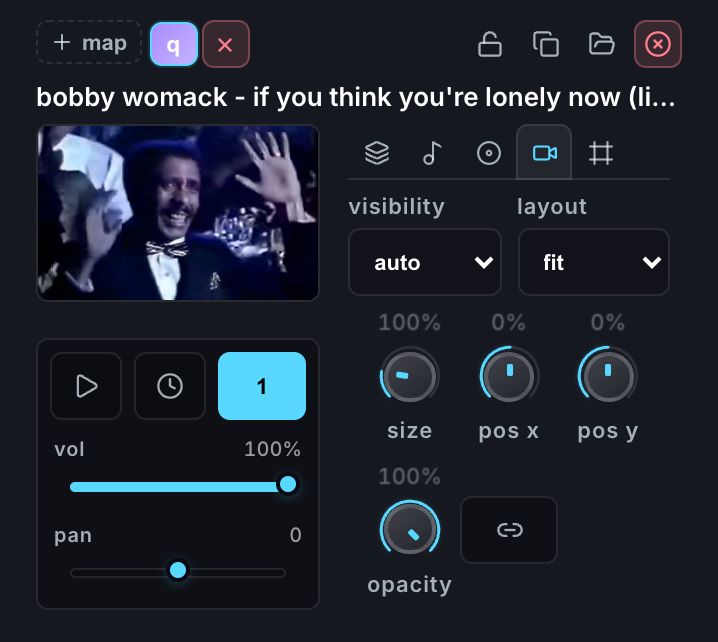
Hold four pads and four clips share the frame, composited in real time. Where each one sits is up to you:
- Click a clip on the stage to select it, then drag to move it and use the corner handles to scale. Snapping pulls to edges, centers, thirds, and the other clips.
- Choose how a clip fills its box: fit, fill, stretch, or tile.
- Composition guides (edges / center / thirds) toggle from the stage.
Layers are mute groups
The canvas needs a z-order — who draws over whom — and it reuses a decision you’ve already made. Mute groups are layers. Group 1 is the bottom, higher groups stack above, ungrouped clips float on top.
In practice the two arrangements want the same thing. Your backing loop (group 1, monophonic, one at a time) becomes the backdrop; the stabs you play over it (ungrouped, polyphonic) land on top. Organizing your sound has already organized your picture.
In the capture editor you can restack lanes after the fact, which changes visual depth without touching mute groups or choke behavior.
Opacity, and the envelope in the picture
Each clip has an opacity, and optionally an Envelope → Opacity mode where the clip’s ADSR drives its transparency. The video fades in over the attack, holds at sustain, and dissolves through the release, exactly in lockstep with the audio.
Long attack, long release, and a held chord of three translucent clips is worth trying early. It behaves identically live and in renders, because the same envelope math drives both.
Visibility
Not every pad needs to be seen:
- Hidden — audio only. For basslines and texture pads that shouldn’t interrupt the picture.
- Auto — visible while playing. The default.
- Always — prioritized within its layer while playing. For the clip that is the show.
Stage extras
Settings → Appearance can show the project title on the stage, and governs caption appearance. Turning the camera on keeps its live monitor visible on the canvas even while idle, which is what the clean-plate and clone-composite workflows need — see The live looper.
A clip’s on-screen face doesn’t have to be its own video, either. See Clip visuals.