The capture editor
Where a captured performance becomes material you can play again.
Every recording road leads here. Rewind opens it, a finished take opens it, a looper session opens it, editing a Song Section opens it. What you get is your performance as lanes on a timeline, still editable.
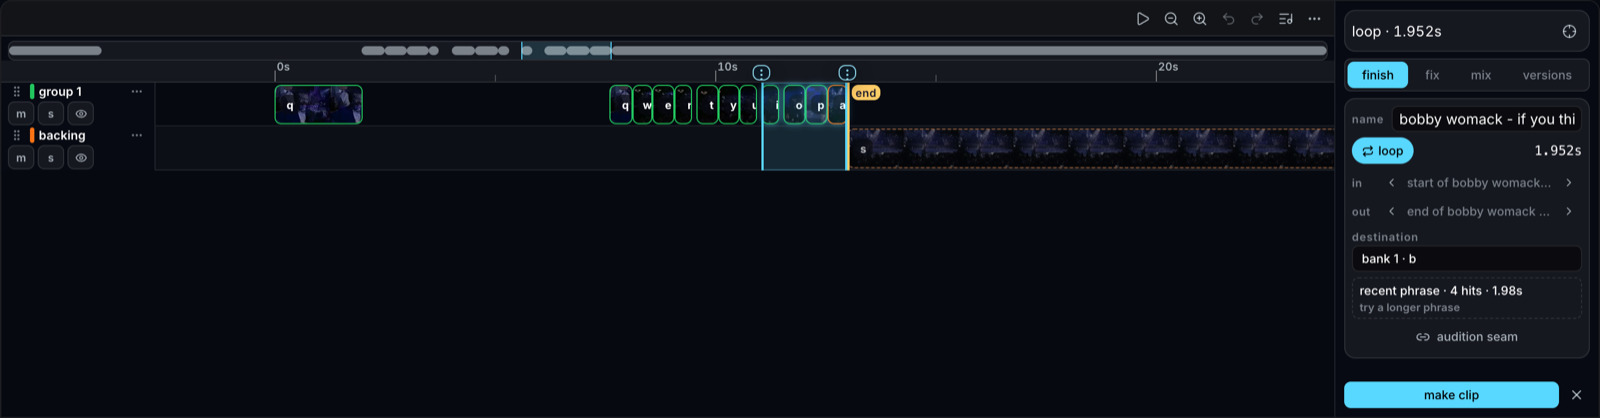
Selecting
Select a range and preview it in place. Space previews; Shift+Space auditions the loop seam, which is the thing you actually need to hear before committing to a loop.
Both handles snap rigidly to the nearest chop, recorded-input, camera-take, loop-seam, or session boundary — so a selection lands on something real rather than near it. Option + arrows step the loop end; add Shift to step the start instead.
Mixing
Open the Mix workspace to expose mute, solo, gain, pan, and video state directly on every timeline lane. The selected-lane inspector gives exact values.
All of it stays editor-local. Your live pad settings are untouched, which means you can mix a capture aggressively without disturbing the instrument you played it on.
Arranging
- Restack any lane by its handle — mute-group lanes, recorded audio/video passes, and standalone camera rows all use top-first layer order. Paired audio and camera move together, and the saved render uses the edited order. This changes visual depth without touching mute groups or choke behavior.
- Hide a lane’s video while keeping its audio with the eye toggle.
- Nudge a whole lane earlier or later to fix timing.
- Rewind and performance audio/video takes share one lane, while their mute and visibility controls stay independent.
Loop layout
A looper session can be laid out two ways:
- Stacked — all passes in one window, the way you played it.
- Build-up — base loop alone, then each layer entering one cycle later. This is the arrangement-ready version.
For the visual side, switch between the performed, adaptive, and fixed-max layouts, drag any tile into a manual arrangement, or include played chop videos in the same reflow. Manual placements override the selected layout.
Camera cutouts and clone performances
The BG button on a camera lane removes that take’s background without first rendering it to a separate clip. The effect is local to the capture and shows in both preview and final render.
For a looper performance with two or more camera passes, More actions → Clone composite aligns the performers and places their cutouts over one clean plate — one of you playing three instruments at once.
Clone composite needs a clean plate first: with camera input enabled, its live monitor stays on the canvas even while idle, and the floating Clean plate action on that preview gives you a four-second countdown to leave the frame before the plate is saved for that camera and resolution. Later sessions reuse it automatically; replace or clear it whenever the camera moves.
Making something out of it
- Render the selection to a clip — usually a loop — which lands on a pad, ready to be played, re-chopped, or built on.
- Bounce one layer by itself, either composited in the frame or at its original size.
- The Versions rack holds the artifacts a session has produced, so one capture can yield several clips over time.
That last step closes the loop the app is built around: perform → capture → render → the result is an instrument again.
Getting back to the board
The editor carries its own Song button in the timeline toolbar, beside the overflow menu. Editing a Section doesn’t strand you: add this session as a Section, cue another, or walk the Roadmap without leaving the editor. See The Song Board.